Western Laundry/bath/mudroom remodel

My parents have always been so supportive of my siblings and I with anything we have ever wanted to do. From sports,horseshows, calf roping, my love for interior design/decorating and anything inbetween.My mom really has never cared for being in the house (she perfers the barn with her horses) and so I basically got to do what I wanted. Before I moved out and went to college I painted my room way too many times to count. My parents let me choose everything from the orange (it was a pretty orange if I do say so myself ;)) wall color to the $100 faucet, when they remodeled "the kids" bathroom about the time I was a freshman in high school..... so about 6 months ago when for the first time ever my mom actually wanted some remodeling done and had some ideas of what she wanted, I knew it would be the perfect opportunity to sort of thank her for letting me learn a lot about interior decorating on her house (good and some not so good).
Here's the before:


My parents have always been so supportive of my siblings and I with anything we have ever wanted to do. From sports,horseshows, calf roping, my love for interior design/decorating and anything inbetween.My mom really has never cared for being in the house (she perfers the barn with her horses) and so I basically got to do what I wanted. Before I moved out and went to college I painted my room way too many times to count. My parents let me choose everything from the orange (it was a pretty orange if I do say so myself ;)) wall color to the $100 faucet, when they remodeled "the kids" bathroom about the time I was a freshman in high school..... so about 6 months ago when for the first time ever my mom actually wanted some remodeling done and had some ideas of what she wanted, I knew it would be the perfect opportunity to sort of thank her for letting me learn a lot about interior decorating on her house (good and some not so good).
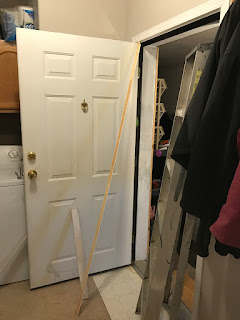
Here's the before:


Don't mind all the mess!! The washer and dryer made a great work bench.


Everything was original to the house. We moved into this house when I was in kindergarten, so almost 20yrs ago.
After:

I started out with Jacobean stain and......hated how dark it was for the space. I ended up taking the whole wall down, sanding them all and re-stained them using Earl American colored stain. Sooo much better.


My parents didn't want to buy new cabinets, so we left the existing ones. I painted them and added a stain glaze. These weren't my favorite project and I don't absolutely love how they turned out but they look better than before and saved some money.


My mom requested somewhere to put her Western Horseman magazines. I found these little gems at Hobby Lobby and they were a perfect addition.


I love how this remodel turned out, but I'm soo happy it's done. My husband and I agreed that it's easier to build a house than to remodel.
Comments
Post a Comment