
Baby Farmhouse Table


I'm not sure if it's a good thing that I live an hour away from Lowes, Target and Hobby Lobby because when I get a chance to go to these stores I stock up and spend way too much money. I was wondering Lowes and found some coffee table legs and snatched them up, I really didn't know what I was going to do  with them so they sat in my garage for a few weeks. (The legs cost about $10 each.)
In the mean time I decided I wanted to build a baby farmhouse table for my girls playroom. The first thing I did was build the inside frame like so...
Disclaimer: I am by no means a pro at building and have never been taught, I've just watched and helped my husband build things and self taught. I'm still learning as I go. One thing I'm finding I need to add is a 2"x2" support in the middle of the frame to make it a little more sturdy.

I planed some lumber down that we had in the garage and ripped down a 2"x 2" for the frame and a attached the legs. I made the frame 48"long by 20" wide. I predrilled all of the holes and used screws to attach it all together. I've learned the hard way that it's easier to predrill the holes than have to replace the piece of wood because it split while I put the screw in. I left all the screws exposed because I like the rustic, imperfect look.

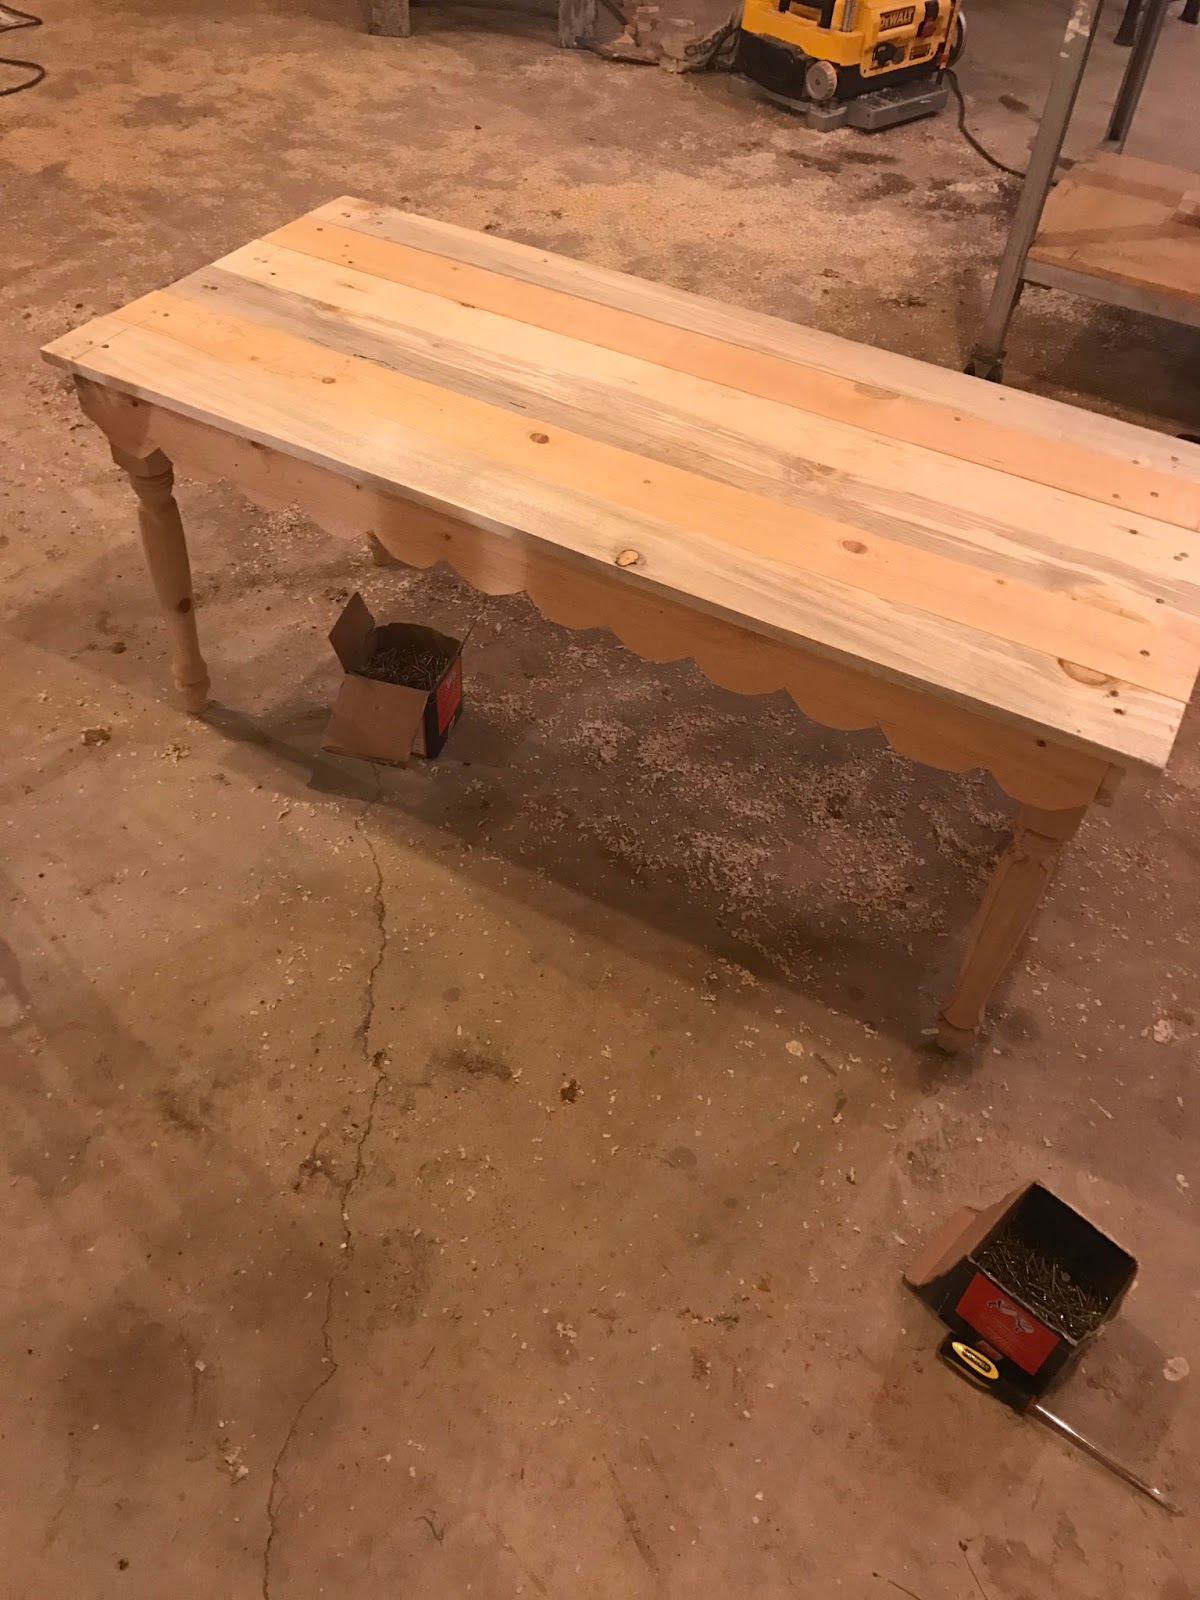
I knew I wanted to try and do a scalloped decorative edges, I wasn't sure how I was going to do it just yet. After thinking about it for a minute I decided I could trace a pattern and cut it out with a jig saw. I used a round sprinkler head that I had as my pattern (can you spy the sprinkler in the back right there)
Once I cut them all out I screwed them to the frame.I then planed 6-1x4s and cut them 50" long and screwed them to the frame. (I use rough cut lumber only because my husband works at a saw mill that his great grandfather started in 1930s and we have access to it for cheaper than I can buy dimensional lumber....dimensional lumber is way easier to use to build and less time consuming because you don't have to plane each piece down as you go.)
I prefer distressed furniture that looks like it tells a story better than the perfect looking pieces. I took a hammer to the top then I painted it a dark gray (I do this because when I distress it the dark shows through and makes it look more antiqued), once that was dry I painted the white over top. When the white was all dry I sanded on it to give it the distressed antiqued look.
I am in love with this piece and want to add scalloped edges to everything. p.s. the scalloped edges aren't as hard as it sounds, don't let them discourage you from trying.

Comments

Popular posts from this blog

DIY can dispenser

I wanted to add a can dispenser to my large awkward pantry to try and utilize all the space. First we got a sheet of plywood from our local White Mt Lumber then we cut it down to 3 1/2' x 7'. If it sounds huge that's because our pantry's huge. The first thing I did was stain the plywood because even though it is for our pantry I wanted it to look good and not like all the ones I've seen on Pinterest. Not pictured: After I put a coat of stain on I used a brush and some white painted and just dabbed a little paint on the end of the brush and did long quick brush strokes to get an antiqued white finish. Then we (my carpenter and I aka my husband) started cutting the slots for the cans. We decided to make two separate sections for cans, one on the top and one on the bottom. We measured the cans that I had the most of and got the dimensions for the can slots off of them. Why do cans have to come in a million different and sizes?? We cut as many boards
DIY Blanket Ladder   I've been loving the blanket ladders so I decided to build my own. First I ripped down some boards we had in the garage to 1 1/2"x 1 1/2" by x 5' long. Then I cut 4-18" ladder rungs. I decided to fasten it all together with 2" screws. I predrilled all my screw holes so the wood wouldn't split. I don't mind the screws being visible but if you do you can always counter sink the screw holes and plug the hole with a dowel and sand it smooth.  The first rung is on a 13" center from the top of the ladder. The other 3 are on 10" centers. Then I just used some left over stain I had (dark walnut) and stained each of them. Tada just like that you have your own blanket ladders.